
Key Takeaways
- New OEM $400-$1,200 per side. Used $30-$80. One of the biggest gaps on any part
- Everything that fails on a headlight is visible before you pay
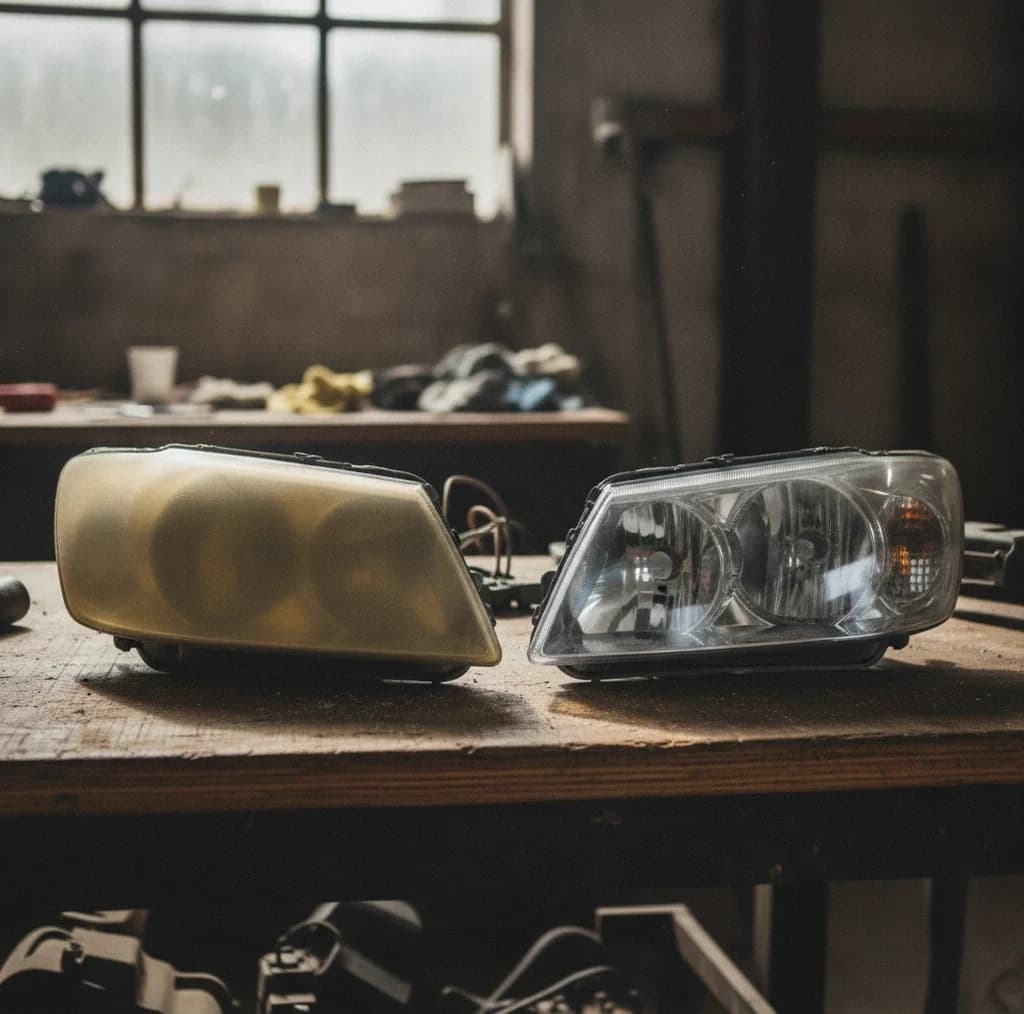
- Cloudy lenses are usually restorable for $20-$40 without replacing anything
- Check mounting tabs first. They snap in collisions and are not repairable well
Restore before you replace
Most people shopping for a headlight assembly have cloudy lenses rather than broken ones, and cloudiness is a surface problem.
Modern lenses are polycarbonate with a factory UV coating. That coating degrades over years of sun exposure, and the plastic beneath oxidises into a yellow haze. The lens itself is usually undamaged.
Restoration is wet sanding through progressively finer grits, typically 800 up to 3000, then polishing and applying a fresh UV clearcoat. Kits are $20-$40 and the job takes about an hour per side. The clearcoat is the part people skip, and skipping it means the haze returns within a year.
When restoration will not work: crazing that appears as fine cracks within the plastic rather than on it, internal moisture that has stained the reflector, or a reflector whose coating has burned or peeled. Those are inside the sealed housing, and replacement is the answer.
What the assembly costs
| Route | Per side | Notes |
|---|---|---|
| Dealer OEM | $400-$1,200 | Adaptive LED units run far higher |
| Aftermarket | $80-$300 | Fit and beam pattern vary in quality |
| Used OEM, yard | $30-$80 | Original fit and beam pattern |
| Restoration kit | $20-$40 | Does both sides if the lens is sound |
The argument for used OEM over new aftermarket is worth making. Cheap aftermarket assemblies frequently have poor beam cutoff, which scatters light and dazzles oncoming drivers while lighting the road worse. A used OEM unit has the original optics. For a similar price or less, it is generally the better part.
Inspecting one at a yard
- Mounting tabs first. They are thin plastic and snap in even minor impacts. A cracked tab means the light will never sit straight and cannot be aimed properly. Check every one before anything else.
- Look for internal moisture. A tide line or white residue inside means the seal failed. Some condensation after rain is normal; staining is not.
- Check the reflector coating. It should be bright and even. Dull patches or peeling mean the output will be poor regardless of the bulb.
- Examine the lens for crazing. Surface haze is fixable. Fine cracks in the plastic are not.
- Confirm the connector matches yours, and check the pins for corrosion.
- Check the adjuster screws turn freely. Seized adjusters mean you cannot aim it.
- Match the trim level. Halogen, HID and LED variants of the same model use different assemblies and often different wiring.
The variants that complicate things
Headlights used to be simple. On newer vehicles they are not always.
| Type | Used-part difficulty |
|---|---|
| Halogen | Straightforward. Direct swap |
| HID with ballast | Take the ballast and igniter with the assembly |
| HID with auto levelling | Levelling motor and sensors must match |
| LED, fixed | Usually fine, but the LED array is not replaceable if failed |
| Adaptive or matrix LED | Often has a module needing coding to the vehicle |
The LED point matters for used buying. In a halogen unit a dead bulb is a $15 fix. In an integrated LED assembly the emitters are part of the housing, so a failed array means the whole assembly. Check that a used LED unit actually lights before buying if the yard allows a jump pack test.
Aiming, which is not optional
A headlight that is not aimed correctly is worse than the cloudy one you replaced. Too high dazzles oncoming traffic, too low leaves you no distance vision, and lateral misalignment puts the light where you are not driving.
The basic method: park on level ground facing a wall about 25 feet away, mark the height of the headlight centres on the wall, and adjust so the top of the beam cutoff sits slightly below those marks and the horizontal kick of the cutoff points to the right on a left-hand-drive car. Do it with the fuel tank at a normal level and nothing heavy in the boot.
Vehicles with auto levelling may need the system recalibrated after a headlight change, which normally requires a scan tool.
Taking the rest while you are there
The bumper cover is usually off or loose on a yard car, which makes several adjacent parts easy money: the other headlight so they match in colour and clarity, fog lights, the grille, headlight washer nozzles if fitted, and the mounting brackets that snap on your car. Corner and marker lights are a few dollars each and always cracked.